
Sunday, August 23, 2015
August Art Journal Page
I didn't even get around to doing anything in my art journal in July. I finally made some time lately, though I think you can tell that I rushed it. I knew I wanted to do something with dragonflies and the lake, and I decided to use my Derwent Graphiks for this. I tried the splatter effect at the bottom, but not crazy about that. Then I doodled the rest and finished with some Martha Stewart glitter glue on the dragonflies, and a little bit on the waves.


Thursday, July 16, 2015
June Art Journal Page and Other Things
There has been a lot of stuff going on lately leaving very little creative time. But I have done a little when I got the chance.
Back in June I got another page done in my art journal. Over winter a few of my perennials didn't make it, but then I was surprised to find a little lupin growing in spite of all the digging I have done in that area. There was one in this yard before, which I moved while cleaning things out, but that one didn't survive. So it was the inspiration for this page, which I coloured with coloured pencils. The other page is just some soft pastels and stamps.
I hope the real one will be purple too.

Another project I got done is this box for my husband to throw his business receipts into. It is made from two fruit snack boxes. I cut the top flaps off of one and the other I cut into pieces and glued them to the first box for more stability. Then I covered the corners and edges with strips of card stock, then gessoed and painted. In the middle I painted some simple purple roses and the outer part is a slightly mottled dark red. Then I used gold embossing powder on the designs in between, and gold paint on the edges. Then I added a few purple rhinestones.
Embossing powder is another thing that looks so easy on YouTube, but I make a mess with it.

And here is my first try at making a polymer rose cane. It's okay, I guess.

Back in June I got another page done in my art journal. Over winter a few of my perennials didn't make it, but then I was surprised to find a little lupin growing in spite of all the digging I have done in that area. There was one in this yard before, which I moved while cleaning things out, but that one didn't survive. So it was the inspiration for this page, which I coloured with coloured pencils. The other page is just some soft pastels and stamps.
I hope the real one will be purple too.

Another project I got done is this box for my husband to throw his business receipts into. It is made from two fruit snack boxes. I cut the top flaps off of one and the other I cut into pieces and glued them to the first box for more stability. Then I covered the corners and edges with strips of card stock, then gessoed and painted. In the middle I painted some simple purple roses and the outer part is a slightly mottled dark red. Then I used gold embossing powder on the designs in between, and gold paint on the edges. Then I added a few purple rhinestones.
Embossing powder is another thing that looks so easy on YouTube, but I make a mess with it.

And here is my first try at making a polymer rose cane. It's okay, I guess.

Thursday, June 18, 2015
More polymer practice
Finally got some creative time yesterday. With camping and yard work I don't get much time in my craft room lately. Good thing it was raining so I didn't have to feel guilty about ignoring the weeds. I really wanted to try more blending and that flower cane again. It still doesn't look like the one in the video but I like it. It kind of looks like a fluffy type of flower. And then of course I turned the scraps into marbleized clay.

Then I wanted to make something but had no idea what to do. So many ideas but when it comes down to doing one of them, I don't know what to choose. I ended up just rolling out some black clay, then using a stamp and embellishing it with more clay and purple pearls. I want to try coating this with resin later and will make it a brooch.


Then I wanted to make something but had no idea what to do. So many ideas but when it comes down to doing one of them, I don't know what to choose. I ended up just rolling out some black clay, then using a stamp and embellishing it with more clay and purple pearls. I want to try coating this with resin later and will make it a brooch.

Monday, June 08, 2015
Snakes
When I saw a tutorial on YouTube for making a snake bangle, I right away thought of my mom. She loves snakes and though she doesn't wear much jewelry I wanted to make one for her birthday.
Good thing I started on this early because the first one didn't turn out so well. It was too thin, and then I broke it a couple of times. Since then I have learned that polymer should always be baked for an hour, not just the 15 minutes per 1/4 inch it says on the package. I tried to re-bake that one, even though I already varnished it with water based Varathane. The varnish held up okay in the heat, but maybe I should have baked it longer yet. I think I put it back in for 20 or 30 minutes but it still broke easily. Or perhaps the problem is that it is Sculpey III and from what I have read, Premo is better.
The second one turned out better and my mom loved it, though she said she probably won't wear it. That one wasn't baked very long either but I let her know that it just has a little flexibility.

Good thing I started on this early because the first one didn't turn out so well. It was too thin, and then I broke it a couple of times. Since then I have learned that polymer should always be baked for an hour, not just the 15 minutes per 1/4 inch it says on the package. I tried to re-bake that one, even though I already varnished it with water based Varathane. The varnish held up okay in the heat, but maybe I should have baked it longer yet. I think I put it back in for 20 or 30 minutes but it still broke easily. Or perhaps the problem is that it is Sculpey III and from what I have read, Premo is better.
The second one turned out better and my mom loved it, though she said she probably won't wear it. That one wasn't baked very long either but I let her know that it just has a little flexibility.

Tuesday, June 02, 2015
First Skinner Blends
Here is my first try at making Skinner blends and trying out a cane tutorial on YouTube. Not exactly perfect but that's what practice is for. I just needed to be more careful while making the blend. And my cane didn't look much like the one in the video, but I still like it.

I tried the cane a second time, using the same blend. I also tried a couple more blends which turned out better.

Then I used what I made to make a pendant. I also have some nice marbled clay made from the scraps.

Here is the video tutorial if you're curious.
https://www.youtube.com/watch?v=hSG2jg8WxgA

I tried the cane a second time, using the same blend. I also tried a couple more blends which turned out better.

Then I used what I made to make a pendant. I also have some nice marbled clay made from the scraps.

Here is the video tutorial if you're curious.
https://www.youtube.com/watch?v=hSG2jg8WxgA
Saturday, May 23, 2015
My first mandala
In my art journal this month I made my first mandala, starting with a black Staedtler pigment liner. I had the idea that it would be flowery but other than that I had no plan, just started from middle and kept adding things. It was kind of relaxing but I really should do these things when my 4 year old isn't around to be able to enjoy it more.

After the outline was done I filled it in with coloured pencils and the blue was done with a Crayola marker.

Earlier this month for Mother's day I made my mom this sign. I had made Tool Rules signs for my husband and my dad and my mom told me that she would like one that says Cookbook Rules. So, I figured, if that's what she wants, I'll make one. This one was more fun because I got to make it pretty. I painted and stamped a piece of hard board, textured and painted the edges, then did the writing on tissue paper with a Sharpie and glued it on. I also glued on silver trim painted with black metallic paint, and made the miniatures in the corners with polymer and wire.


After the outline was done I filled it in with coloured pencils and the blue was done with a Crayola marker.

Earlier this month for Mother's day I made my mom this sign. I had made Tool Rules signs for my husband and my dad and my mom told me that she would like one that says Cookbook Rules. So, I figured, if that's what she wants, I'll make one. This one was more fun because I got to make it pretty. I painted and stamped a piece of hard board, textured and painted the edges, then did the writing on tissue paper with a Sharpie and glued it on. I also glued on silver trim painted with black metallic paint, and made the miniatures in the corners with polymer and wire.

Friday, May 01, 2015
Looks easy on YouTube
I love watching arts and crafts videos on YouTube. So many great ideas. But sometimes they don't turn out so well when I try them. For the latest page of my art journal I decided to try stamping with Pearl Ex powders. I used Stampendous embossing ink and a Martha Stewart stamp around the page set on card stock. I really don't do much stamping so I guess I needed some practice. At first the little flowers were more like blobs but I figured what worked best for me was to not put too much ink on the stamp and do it twice. I also learned to make sure I was paying attention to not stamp upside down, which is what caused the smudges on the top right page.
I also had a problem with the powder not binding with the ink. Even when I let it dry for a long time or heat set it, it would still rub off pretty easily. I used some Krylon Kamar spray to set it but it was hard to wipe away the excess powder without taking off too much.
I finished the pages off with stamps and black ink and coloured the edges of the journal pages with soft pastels before sticking on the card stock pieces.

Another view to try to capture the shine of the powders.

I also had a problem with the powder not binding with the ink. Even when I let it dry for a long time or heat set it, it would still rub off pretty easily. I used some Krylon Kamar spray to set it but it was hard to wipe away the excess powder without taking off too much.
I finished the pages off with stamps and black ink and coloured the edges of the journal pages with soft pastels before sticking on the card stock pieces.
Another view to try to capture the shine of the powders.
Sunday, April 26, 2015
Red peony and my first fairy door
This month I hosted the Different Strokes project at wetcanvas.com and the theme I chose was flowers and they had to be close up, or macro, shots. For my own painting I used a photo I took in my mom's friend's yard as a reference and painted it on a wooden plaque. The total size is about 11.25x8.5" at the longest.

I also made a time lapse video of the painting.
https://youtu.be/hrlAvzD-s48
I also just made my first fairy door for a gift for my aunt. I used polymer clay and a few beads and charms.

I also made a time lapse video of the painting.
https://youtu.be/hrlAvzD-s48
I also just made my first fairy door for a gift for my aunt. I used polymer clay and a few beads and charms.
Tuesday, March 31, 2015
Art Journal Page 3
Some "springtangle", using my Derwent Graphik paint pens. I did have some trouble with leaking and had to try to cover up a few blobs with the white. The black really started giving me trouble, maybe because I was using it for so long. A few other colours leaked as well. Later I read the tip about holding the pen upright and pumping it a few times. It might be a good idea to do that when starting, and again if using the same colour for some time. Sometimes there was a bit of warning when the paint would start to flow a little faster, but other times it was very sudden. You can see a couple of black splotches at the bottom that I didn't bother fixing. It just dripped from the pen.
And if I was to do this again, I would do the black lines last instead of first.
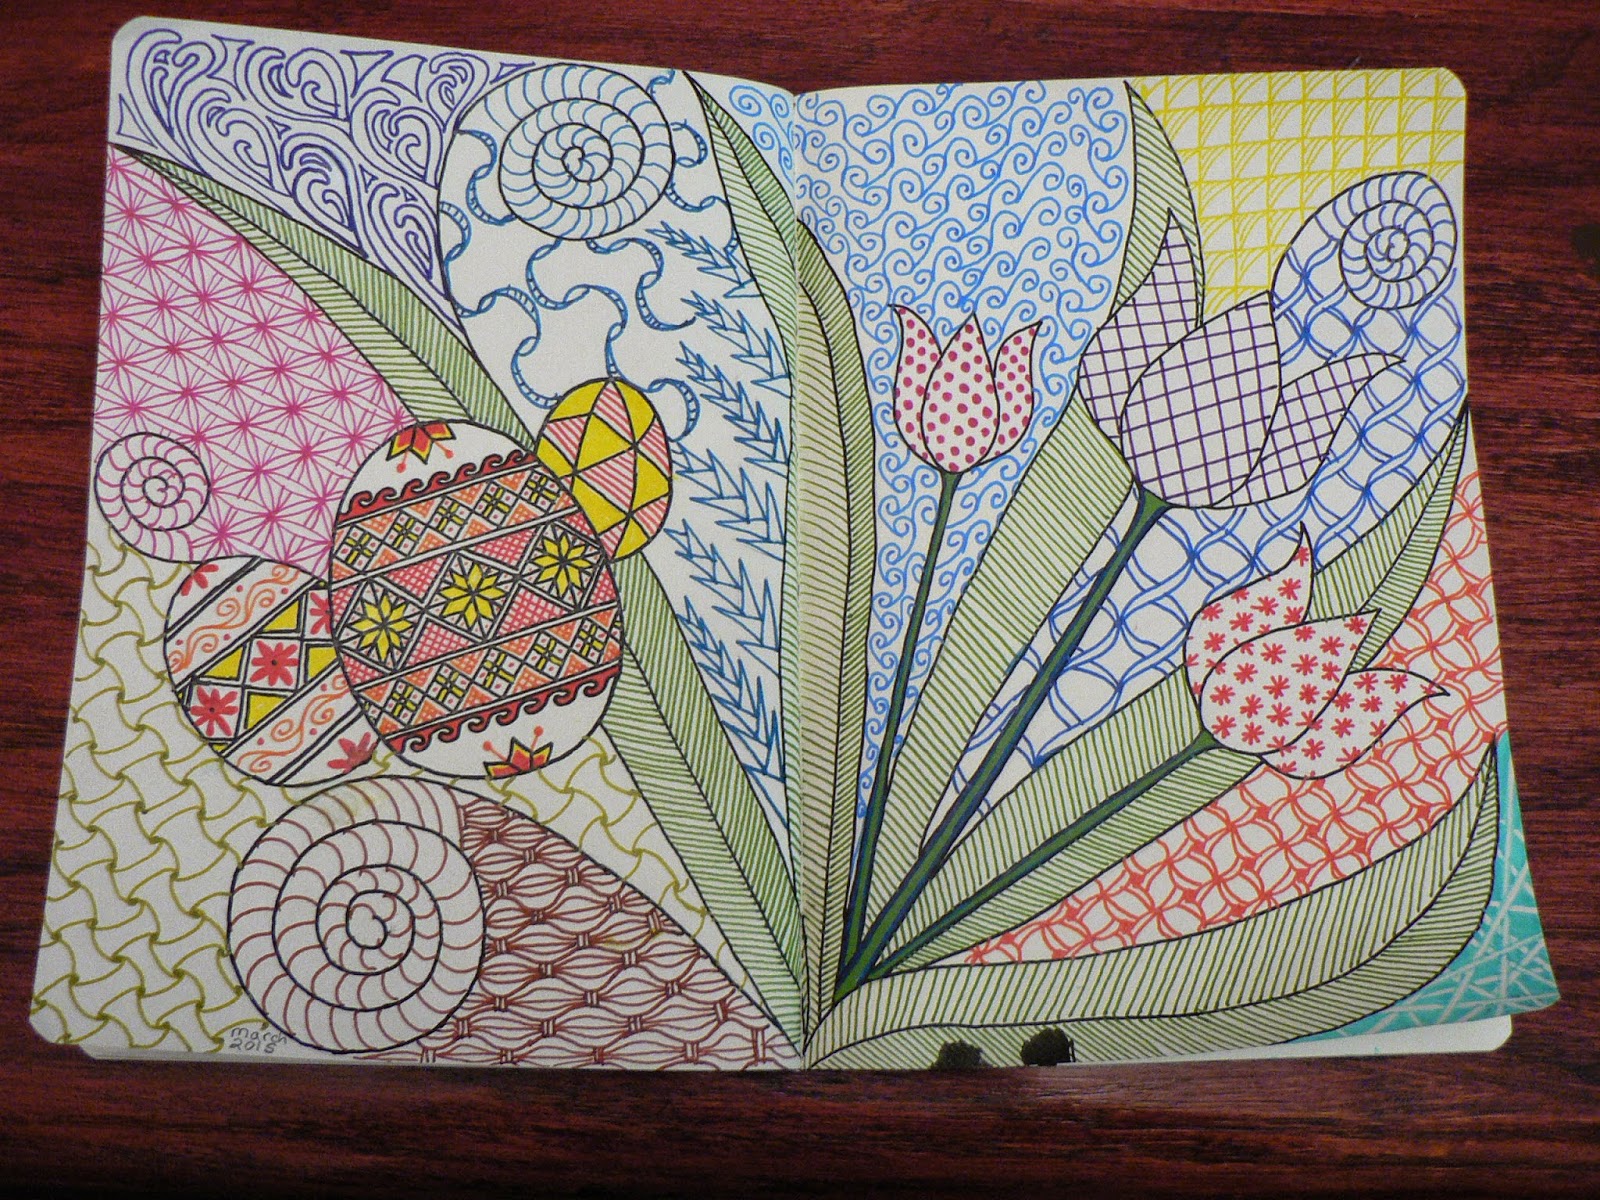
And if I was to do this again, I would do the black lines last instead of first.
Monday, March 30, 2015
Easter Eggs
It has been years since I last made Easter eggs (pysanky). They are very time consuming, it takes all afternoon to do two. It was always hard for me to put other things aside but this year I decided it was time to do some again. I got 12 done, though one kind of got messed up when I tried to use Folkart's acrylic gloss on it, the one on the right side with the red and white cross in the middle. Perhaps it was because it is water based. When I started smearing it on it was picking up colour so I wiped it off but wiped too much and removed some colour from one side of the egg. But I have ideas for how to still make good use of it.
My mom already bought two of these. The rest will be for summer craft sales.

I also tried something new. I painted Easter eggs on poster board with my Derwent Graphik paint pens and made polymer clay bases and turned them into pendants and earrings.

My mom already bought two of these. The rest will be for summer craft sales.
I also tried something new. I painted Easter eggs on poster board with my Derwent Graphik paint pens and made polymer clay bases and turned them into pendants and earrings.
Thursday, March 05, 2015
My First Mixed Media Canvas
The nail polish picture is painted with acrylics on a 10x8" canvas and then I added texture around it with stencils and modelling paste and also just paint. Then I started adding things like metal flowers, painted fabric flowers, buttons, resin pieces with the actual nail polish in them, a watch face, a mirror pendant, and some beads. Then I decorated a 14x11" wrapped canvas and put the 10x8 canvas board inside the back of it to frame it. It took quite a few days to put it all together.

I also recently finished a digital painting of a polar bear. Prints are available on Fine Art America and Pixels.com. This is one of the polar bears that live in the Assiniboine Park Zoo in Winnipeg and his name is Storm.
 http://pixels.com/featured/polar-bear-michelle-moroz-chymy.html
I also recently finished a digital painting of a polar bear. Prints are available on Fine Art America and Pixels.com. This is one of the polar bears that live in the Assiniboine Park Zoo in Winnipeg and his name is Storm.
Saturday, February 21, 2015
Art Journal Page 2
This month for the Different Strokes Project at wetcanvas.com the theme was Canadian post impressionism, in other words, Group of Seven type stuff. This was my attempt. I tried to use bold colours and brush strokes but not sure if this really makes me think Group of Seven. Maybe more like Clarence Gagnon, who was also painting at the time.
The painting is only ATC size, 2.5 x 3.5 inches.

Then I added it to my latest art journal page. The background is all acrylic paint. Since this is just for fun and I was trying to do it quickly, it's not as refined as I would normally paint, but I would like to try something like this again in a more serious format. I tried painting some frost and a realistic snowflake, and the swirls were made with a stamp. Plus, there are paper snowflakes and the others are made with home made modelling paste used through a brass bookmark that has a snowflake design cut into it. I also put some of the modelling paste around the little painting. And then there is a little touch of glitter nail polish. The writing is done with a Derwent Graphik pen. I wonder how many Canadians recognize the song title.

My next journal will have thicker paper.
The painting is only ATC size, 2.5 x 3.5 inches.
Then I added it to my latest art journal page. The background is all acrylic paint. Since this is just for fun and I was trying to do it quickly, it's not as refined as I would normally paint, but I would like to try something like this again in a more serious format. I tried painting some frost and a realistic snowflake, and the swirls were made with a stamp. Plus, there are paper snowflakes and the others are made with home made modelling paste used through a brass bookmark that has a snowflake design cut into it. I also put some of the modelling paste around the little painting. And then there is a little touch of glitter nail polish. The writing is done with a Derwent Graphik pen. I wonder how many Canadians recognize the song title.
My next journal will have thicker paper.
Thursday, January 29, 2015
Wagon Wheels
This was inspired by a group project at wetcanvas.com where the theme was wheels
of any kind. Someone mentioned these Wagon Wheels and I happened to have some in
my cupboard. This is 7x5" on acrylic paper.

Wednesday, January 28, 2015
Christmas is over
I can finally say I am all done with Christmas projects. One was to repaint this Christmas countdown I made years ago. I had first coloured it with pencil crayons but wasn't very happy with it. I gave it a couple of coats of clear gesso, sanded it a bit because it was gritty, then painted over it with acrylic paint and Derwent Graphik pens.
Before:

After:

The before picture shows just one window flipped and the other one shows them all flipped. Some of those little images were really challenging, the squares are only 1 1/4".
The fabric on my rocking chair seat was really falling apart so I did some sewing. I didn't have enough of anything so I used two different fabrics and just did the seat and back.

Before:
After:
The before picture shows just one window flipped and the other one shows them all flipped. Some of those little images were really challenging, the squares are only 1 1/4".
The fabric on my rocking chair seat was really falling apart so I did some sewing. I didn't have enough of anything so I used two different fabrics and just did the seat and back.
Tuesday, January 20, 2015
Art Journal Page 1
I recently decided to start an art journal, and what better time than at the beginning of a new year. This journal is a way to try new things and experiment and just have fun. No pressure to make a masterpiece, as you can see here. I wanted to keep it simple but it still took me all afternoon.
The background is acrylic paint and represents the way my mind feels sometimes, exploding with ideas, and also hope for a bright future. The writing is on painted card stock and done with black embossing powder. Same with the numbers but with gold glitter embossing powder and outlined with a black Derwent Graphik pen. The outer edges of the number cards are outlined with a gold Sharpie, which I also used in the corners. It was a good learning experience and reminder of things I already knew, like I know that red is very transparent and that I should have used the purple more sparingly.
This is a Fabriano book. The two page spread is 11 1/2 x 8 1/4".

The background is acrylic paint and represents the way my mind feels sometimes, exploding with ideas, and also hope for a bright future. The writing is on painted card stock and done with black embossing powder. Same with the numbers but with gold glitter embossing powder and outlined with a black Derwent Graphik pen. The outer edges of the number cards are outlined with a gold Sharpie, which I also used in the corners. It was a good learning experience and reminder of things I already knew, like I know that red is very transparent and that I should have used the purple more sparingly.
This is a Fabriano book. The two page spread is 11 1/2 x 8 1/4".
Wednesday, January 14, 2015
Happy New Year!
A little late, I know, unless you follow the old calendar. December was a busy month with Christmas projects and making a few gifts, including this sign for my husband:

Then my son and I both had the flu for over a week which started a few days before Christmas. We made through Christmas okay but I was glad I wasn't hosting anything, I felt so tired and weak. For quite a few days after that I really didn't want to do anything, could barely even think about painting. Finally started to feel better after the new year and started feeling like painting something. The December Different Strokes challenge at wetcanvas was about Christmas shopping and I decided to focus on the temptations in the stores in December. The local Home Hardware really puts out a display of Christmas stuff and I really have to work hard to control myself when I go there. I snapped a picture and painted just a small section of their display. I still was feeling a little shaky and tired so I kept it quick and simple. Painting this way is really fascinating, just a few strokes of light and dark and objects appear.

And I am still finishing up Christmas projects. I had so many ideas in mind that I wanted to get a few of them done. A few ornaments and jewelry sets are ready for next year. Just a couple more things to do and then I can move on to different things, like my very first art journal and trying out some new products I have. For example, these embossing powders which I made samples of and glued to the bottles. I got that idea from YouTube, but I also coloured half the circle with clear ink and the other half with black.

Then my son and I both had the flu for over a week which started a few days before Christmas. We made through Christmas okay but I was glad I wasn't hosting anything, I felt so tired and weak. For quite a few days after that I really didn't want to do anything, could barely even think about painting. Finally started to feel better after the new year and started feeling like painting something. The December Different Strokes challenge at wetcanvas was about Christmas shopping and I decided to focus on the temptations in the stores in December. The local Home Hardware really puts out a display of Christmas stuff and I really have to work hard to control myself when I go there. I snapped a picture and painted just a small section of their display. I still was feeling a little shaky and tired so I kept it quick and simple. Painting this way is really fascinating, just a few strokes of light and dark and objects appear.
And I am still finishing up Christmas projects. I had so many ideas in mind that I wanted to get a few of them done. A few ornaments and jewelry sets are ready for next year. Just a couple more things to do and then I can move on to different things, like my very first art journal and trying out some new products I have. For example, these embossing powders which I made samples of and glued to the bottles. I got that idea from YouTube, but I also coloured half the circle with clear ink and the other half with black.
Tuesday, December 02, 2014
New beaded ornaments.
These star spheres are an adaptation of the pendant I made. Many hours went into these.

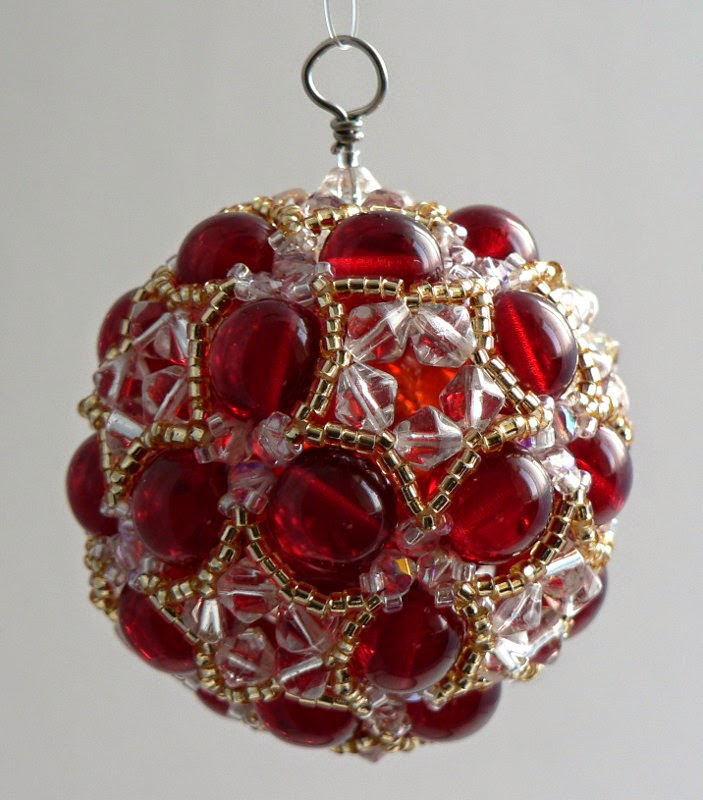
I also bought a bunch of large beads that are netted with thread and came up with this design for one of them.

So many ideas are running through my head for Christmas ornaments and jewelry, it's hard to sleep at night.
I also bought a bunch of large beads that are netted with thread and came up with this design for one of them.
So many ideas are running through my head for Christmas ornaments and jewelry, it's hard to sleep at night.
Saturday, November 29, 2014
Blue Ice Star Sphere
My site is working normally again and I have uploaded a new set. It wasn't intentional but this does make one think of a certain movie.

Monday, November 24, 2014
Technology Troubles
It seems like a week doesn't go by where I'm not wondering why something isn't working. Printers, scanner, website, iPhone.... the list goes on.
This time it's my website. I recently had to change hosting and had everything uploaded and working properly but suddenly it won't work with www in the links. I still wanted to do an update so I have started to remove the wwws from a couple of pages but I am also waiting for a response from my host to find another way to fix this. After all, many people are used to typing www with an address so I still want it to work either way.
On the upside, I sold the three painted ornaments I previously posted. And today I added three different ones to the holiday page on my site.


This time it's my website. I recently had to change hosting and had everything uploaded and working properly but suddenly it won't work with www in the links. I still wanted to do an update so I have started to remove the wwws from a couple of pages but I am also waiting for a response from my host to find another way to fix this. After all, many people are used to typing www with an address so I still want it to work either way.
On the upside, I sold the three painted ornaments I previously posted. And today I added three different ones to the holiday page on my site.
Saturday, November 15, 2014
Mini Painted Christmas Ornaments
These three little Christmas ornaments have just been added to my site on the Holiday and Decor page. They are 2x2" acrylic paintings bordered by copper tape and embellished with glass beads. They may look familiar to some of my friends because I had previously posted them on my personal Facebook page.


Subscribe to:
Posts (Atom)